.jpeg)
As the days of wet ink signatures fade into our collective rearview mirror, life science organizations are increasingly turning toward digital signature or electronic signature solutions to save time and streamline compliance. One of the leading digital signature tools (and our personal favourite) is Adobe Acrobat Sign. It has loads of powerful, configurable controls and protocols that help facilitate collaboration and make compliance effortless. Sounds great, right? Well, that’s because it is. However, before you run out there and begin applying digital signatures on everything that comes your way, there’s one big step you’ll need to complete:
Validation.
Validating Adobe Acrobat Sign for 21 CFR Part 11 isn’t just a “nice to have”—it’s an obligation. The FDA’s 21 CFR Part 11 requires the validation of systems used for electronic records and signatures. Those who wish to leverage Adobe Acrobat Sign need to establish that the system’s functionality (signature properties, signature validity etc) and identity authentication settings meet the applicable regulatory requirements. Starting to sound like a lot? Don’t worry, this is where we can help you.
With the help of our internal validation experts, we’ve created a step-by-step roadmap to help you validate Adobe Acrobat Sign for 21 CFR Part 11 quickly and effectively. Now, we’re sharing it with you. Let’s dig in!
What you'll get in this article:
- The Three Pillars of Validating Adobe Acrobat Sign
- Who Needs to Be Involved in Your Validation Project?
- Traditional Approach vs Risk-Based Validation: Which Should You Use?
- Risk-Based Validation and Adobe Acrobat Sign: A Power Couple
- Validation Support from Adobe
- 8 Steps to Validating Adobe Acrobat Sign
- Step 1: Onboarding with Adobe - Which Adobe Product do you Need?
- Step 2: Grab the Necessary Deliverables
- Step 3: Review the Executed Test Scripts
- Step 4: Adapt the Adobe Vendor Assessment Template from Montrium
- Step 5: Configure Your Adobe Acrobat Sign Account
- Step 6: Verify Your Configuration
- Step 7: Implement Procedures
- Step 8: Complete and Adapt the Validation Report from Montrium
- Now, Sit Back and Enjoy Your New Digital Signature Tool!
- Hear Us Out: How Montrium's Accelerator Toolkit Will Help You
- The Takeaway
The Three Pillars of Validating Adobe Acrobat Sign
For those who aren’t familiar with the ins and outs of software validation, it really boils down to one crucial goal: making sure that your software actually does what it says it can do. You can’t simply run a few tests and call it a day; instead, you need to provide comprehensive proof that you’ve done your due diligence on your software provider and ensure the system works as intended. In order to meet the standards set by regulators, we recommend structuring your Adobe Acrobat Sign validation process around three key pillars.
-
Vendor qualification: You’ll need to assess the competence and reliability of your service provider, aka Adobe. This means understanding which regulatory responsibilities are attributed to Adobe and how they fulfill them, and then carrying out an assessment process to prove it. You could try to qualify Adobe as a vendor through one of the three main processes—a basic assessment, an assessment questionnaire, or an on-site audit—but all of these approaches present different challenges and complexities. If you want to avoid the hassle, we recommend taking a look at the Validation Accelerator Toolkit, which comes with a pre-completed Vendor Assessment Report.
-
Validation and verification: You’ll need to ensure and document that the system is correctly performing its intended function. Don’t worry, we’ll go over this in detail in our step-by-step framework below.
-
Procedural controls: Finally, you’ll need to provide governance for compliance, system administration, and use. This means that you’ll need to be ready to draft an SOP or policy that governs your usage of Adobe Acrobat Sign. We’ll also touch on how to do this below.
Now that you know what the three pillars of validation are, let’s turn our focus to who you’ll need to involve in your process.
Who Needs to Be Involved in Your Validation Project?
Before you start your validation project, you’ll need to select the A-team who can help you to bring it over the finish line. Here are the roles that will need to be involved in the Adobe Acrobat Sign validation process:
-
Process Owner: This role is the voice of the end-user. They ensure the system meets their business process needs.
-
System Owner (Admin): Typically from IT, this role is responsible maintaining the system configuration and creation of user accounts.
-
Quality Assurance: QA will make sure that SOPs are implemented and followed, the vendor assessment is complete, and that the system complies with regulatory requirements.
Once you’ve selected your team and ensured that everyone is up to speed, you’ll be ready to begin defining your validation methodology.
Traditional Approach vs Risk-based Approach: Which Should You Use?
Your approach to validation is critical in determining how quickly and efficiently you’ll be able to complete the process. There are two main approaches you can take: traditional validation and risk-based validation.
While still used by some organizations, traditional validation has fallen out of favour with the life sciences industry. Why? Well, it involves exhaustive testing and examination of every component of a given software, irrespective of the level of risk it poses to an organization. While this does produce comprehensive evidence and ensure that there are no surprises once the system is up and running, it nevertheless makes for a cumbersome process that can drain resources and yield unnecessary documentation. As a result, risk-based validation has evolved into the preferred validation methodology for life science companies and regulators across the globe. So, what does it entail?
Risk-Based Validation and Adobe Acrobat Sign: A Power Couple
Like most things in life, validation isn’t a one-size-fits-all undertaking. Different types of software expose both organizations and patients to different levels of risk. For instance, think about a software that’s used to control patients’ insulin injections versus, say, a software for electronically signing documents. One of those poses a far greater risk to patient safety than the other should it not work as intended, and your validation process should reflect that. As the name implies, risk-based software validation entails understanding your organization’s specific context, carrying out risk assessments, and whipping out your critical thinking skills to mitigate identified risks. Instead of creating documents simply for the sake of it, risk-based validation invites organizations to perform logical assessments of where potential risks may lie when it comes to patient safety, product quality, and data integrity.
By embracing the idea that validation efforts should be proportionate to risk, you’re able to spend less time performing unnecessary processes and focus more of your efforts on mission-critical tasks. This is why risk-based validation is a perfect fit for validating Adobe Acrobat Sign; it saves you a lot of time and resources.
To summarize, here’s the key differences between traditional and risk-based validation:
Next, we’ll explain where you can go to get support during your journey of validating Adobe Acrobat Sign.
Validation Support from Adobe
To strengthen their service offering for life science organizations and make the validation effort as effective and efficient as possible, Adobe is collaborating with Montrium to offer validation document templates for Enterprise-level customers. The templates help demonstrate how the features and functions of Adobe Acrobat Sign adhere to both your business needs and 21 CFR Part 11 regulations.
Regulatory agencies and industry best practices, such as ISPE’s GAMP 5, recommend following a risk-based validation approach per 21 CFR Part 11.
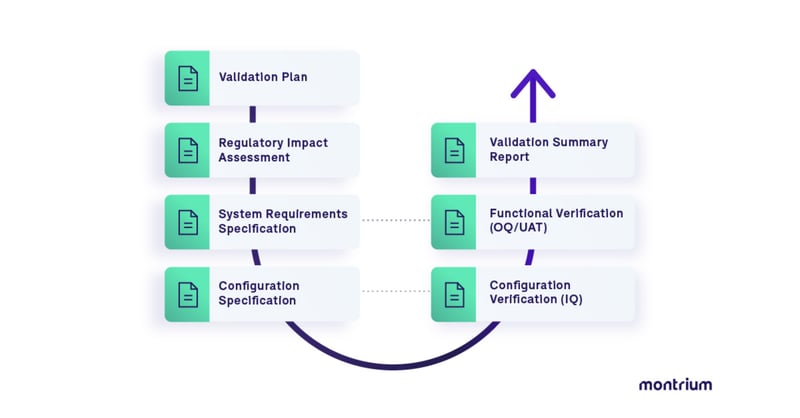
Included in the free Adobe Acrobat Sign Validation Package (available for both e-signatures and certificate-based digital signatures), are document templates for the following:
- Validation Plan
- Regulatory Impact Assessment
- System Requirements Specification
- Validation Test Protocol (including Test Scripts)
- Work Instruction
- Requirements Traceability Matrix
- Validation Summary Report
These documents are updated and re-issued as necessary for each major release in conjunction with an impact assessment report, which describes the potential impact from a validation perspective.
Each template in the Adobe Acrobat Sign Validation Package can be adapted to your organization’s unique requirements and can be prepared as part of a built-in framework for producing GxP-compliant digital signatures and records with Adobe Sign.
The Adobe Acrobat Sign Validation Package is designed to help customers establish documented evidence that Adobe Acrobat Sign is fit for its intended use. The following typical use cases are considered in the pack:
.jpeg?width=1600&height=836&name=DG%20Planning%20-%20Adobe%20Sign%20campaign%20-%20Page%201%20(1).jpeg)
So, now that you know where to find the documents to jumpstart your validation journey, let’s go over how to actually use those documents in order to get Adobe Acrobat Sign validated, compliant, and most importantly, live!
8 Steps to Validating Adobe Acrobat Sign
Step 1: Onboarding with Adobe – Which Adobe Product Do You Need?
In order to be able to generate 21 CFR Part 11-compliant digital signatures, you’ll need to ensure that you’re using the correct Adobe product. The standard Adobe Acrobat reader program isn’t sufficient for this purpose; instead, you’ll need to invest in Adobe Acrobat Sign Solutions for enterprise. Once you have an enterprise tier subscription, you’ll need to ensure you have the Bio-Pharma settings enabled.
Step 2: Grab the Necessary Deliverables
Next, you need to lay the groundwork for your validation process by ensuring you have the necessary deliverables on-hand and ready to be put to work. These deliverables include the Adobe SOC 2 Type 2 audit report, which is available from the Adobe Trust Center, and our free Adobe Acrobat Sign Validation Package. The SOC 2 Type 2 report outlines Adobe’s internal controls and details the security measures they have in place to safeguard customer data. The free validation package includes several valuable pieces of documentation, such as validation test protocols and scripts, and test scripts that have been executed by Montrium that you can choose to leverage in order to speed up your validation process. Together, the SOC 2 Type 2 report and contents of the validation package will form the cornerstone of your validation efforts.
Step 3: Review the Executed Test Scripts
Once you’ve secured the Adobe Acrobat Sign Validation Package, you’ll need to review the executed test script results in order to ensure that they’ll be sufficient for your intended use of Adobe Acrobat Sign. As we said before, validation is not a one-size-fits-all undertaking and it’s necessary to be certain that your efforts are tailored to your unique organizational context.
Step 4: Adapt the Adobe Vendor Assessment Template from Montrium
Next up, you're going to need to perform a vendor assessment of Adobe. Luckily, if you’re using Montrium’s Validation Accelerator Toolkit, you’ll be able to adapt and approve the vendor assesment template that Montrium has already completed for you. While the Validation Accelerator Toolkit isn’t available for free, it will save you an incredible amount of time during your validation process. We’ve had our experts rigorously review Adobe’s SOC 2 report and detail it in the vendor assessment so that all you have left to do is adapt, review, and approve—a lifesaver if you’re trying to get Acrobat Sign up and running quickly.
Step 5: Configure Your Adobe Acrobat Sign Account
Once you’ve completed the vendor assessment, you’ll want to configure your Acrobat Sign account to mirror the validation package, which will allow you to fully leverage the executed test scripts. Note for customers: if this doesn't match completely, our team is able to advise you on how to adjust how you validate to ensure you have adequate evidence to demonstrate your instance of Adobe is compliant.
Step 6: Verify Your Configuration
If you’ve already gotten this far, take a moment to congratulate yourself! We know it’s a lot of work to complete all of these different tasks, but it will be worth it once you’re approving documents at lightspeed with your new—and compliant— digital signature tool. Now, returning to your validation process, you’re going to need to follow the instructions in the configuration verification test script that Montrium provides within the Accelerator Toolkit. We provide these to our customers, but you can also create your own if you have spare time. Here, you’ll need to verify the configuration has been completed correctly and is aligned with the validation package mentioned earlier. Essentially, you need to demonstrate that your Acrobat Sign account has been set up properly to be able to complete digital signature validation.
Step 7: Implement Procedures
Once you’ve verified that everything is configured correctly, there are only two steps left before you’re able to go live with Acrobat Sign. First, you’ll need to author an SOP or policy for e-signatures. These procedural controls ensure that you stay continuously compliant in your use of Acrobat Sign. For those who invest in the Validation Accelerator Toolkit from Montrium, we offer an SOP template that we adapt to the customer’s needs in order to help them save time. As with drafting any SOP, it will be important for you to consult all necessary stakeholders to ensure that your new policy is comprehensive and that everyone is on the same page.
Step 8: Complete and Adapt the Validation Report from Montrium
You made it to the final step of your validation journey! But don’t lose steam just yet. The final step is one of the most important: completing your validation report. You’ll need to author a report that outlines your validation approach and details how you’ve leveraged Montrium’s executed test scripts, tracing back all of your requirements and specifications. In the Validation Accelerator Toolkit, we provide a template of the validation report that you can adapt to your needs to expedite the process.
Now, Sit Back and Enjoy Your New Digital Signature Tool!
Take a moment to acknowledge that the validation journey can feel more like a marathon than a sprint, especially if you’ve chosen to tackle it alone. What a feat! Now, you’ll be able to quickly and easily sign documents with a digital signature with a fully 21 CFR Part 11-compliant solution.
Hear Us Out: How Montrium’s Validation Accelerator Toolkit Will Help You
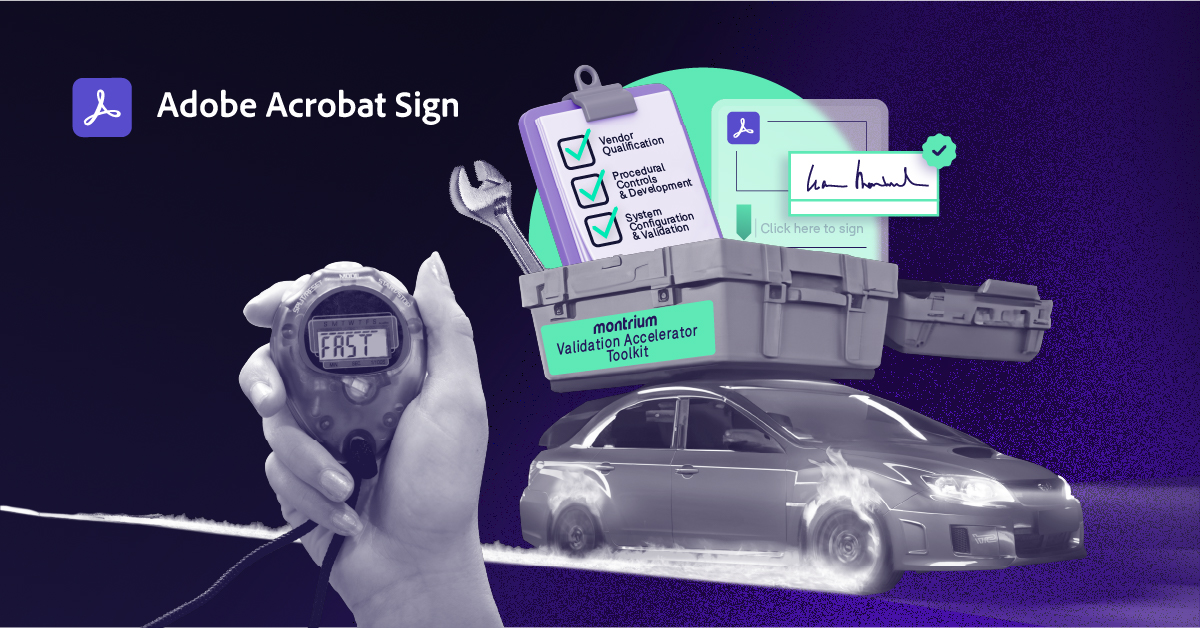
By now, you've probably noticed that we’ve mentioned our Validation Accelerator Toolkit several times—and with good reason. It can save you a lot of time when validating Adobe Acrobat Sign. We’re not talking a couple of hours or even days. On average, our customers save three months with this toolkit.
What exactly is the Validation Accelerator Toolkit? Here’s what you can expect to receive:
- A fully managed validation project
- 8+ hours of expert consulting and guidance
- Tried-and-tested validation strategy leveraging executed test scripts
- Adobe Vendor Assessment Report template
- Validation Report template
- Electronic signature SOP policy template
- Employee ID verification and non-repudiation form
- e-Signature notification letter for the FDA
As you can see, this isn’t just any old toolkit. It’s been developed hand-in-hand with Adobe and designed to provide the maximum amount of value—and time savings—possible. If you’re on a time crunch or you simply want to ensure that your validation process is done correctly, the toolkit is probably a good fit for you. Plus, we can also advise your team on how to maintain long term validation compliance with our continuous validation subscription service.
Wait! Do you have questions about the Validation Accelerator Toolkit? If so, please reach out to Montrium directly and we will be able to provide you with any information you might need.
The Takeaway
We’ve said it before and we’ll say it again: software validation can be a daunting task, but it doesn’t have to be . Sure, you’ll need to be comfortable having several different irons in the fire, but with our proven eight-step framework and a little (read: lot) of help from our Validation Accelerator Toolkit, you can complete Adobe Acrobat Sign validation and go live in under 30 days. Not ready to take our word for it? Have a look at how we helped Pharmascience save two months of work while validating Adobe Acrobat Sign...
P.S. Don't forget, if you have any questions about the Validation Accelerator Toolkit, you can reach out the Montrium team directly and we'll be more than happy to help!

Gianna De Rubertis
Gianna is the Director of the Professional Services team and is responsible for in-house verification projects as well as validation services provided to external clients. She has extensive validation experience, which includes validation of manufacturing equipment, utilities, and computerized systems (including ERP, EDMS, and eSignature solutions). Gianna has also developed a solid understanding of the various regulations which apply to the pharmaceutical, biotech and device industries.



-1.png)
